
How It Started
Some friends of mine introduced me to this Hohner Pianet T, which had been stored in the corner of a barn for many years. For those unfamiliar with the instrument, it’s one of the first portable electromechanical keyboards, first produced in the 1970s, and was revolutionary at the time.
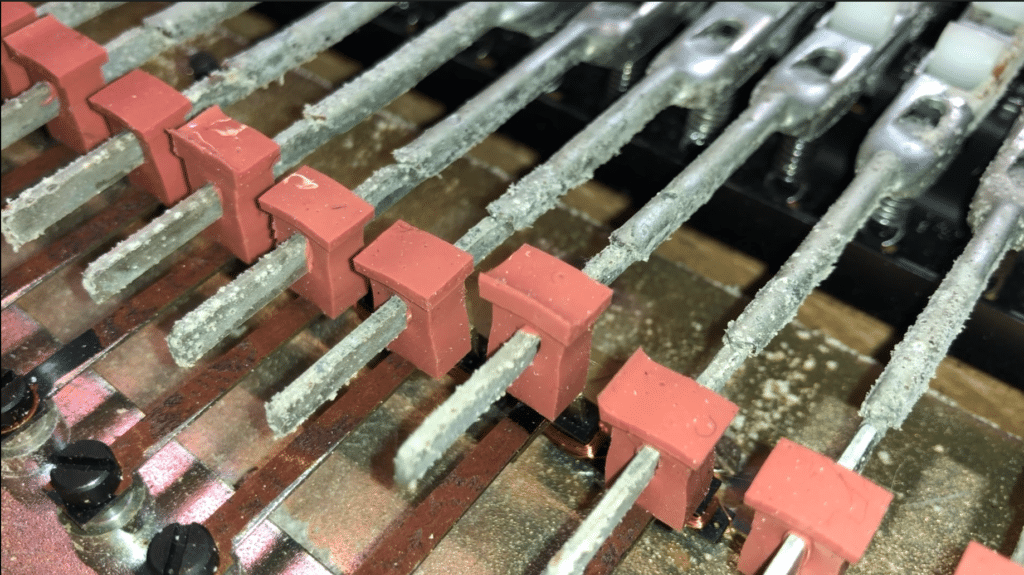
Unlike the later electronic synthesisers which employed oscillators to produce notes, this instrument uses tuned metal reeds. Each key is connected to a small rubber pad, which ‘lifts’ the reed to set it vibrating, and each reed has its own individual pickup coil, which provides the signal. When not connected to an amplifier the keys therefore still make ‘plink-plonk’ noises.
Only the fact that it is fitted with a handle qualifies it as being described as ‘portable’. It’s a solid lump of wood and metal which, by today’s standards, would be designated as requiring two-man-handling.
On the outside it seemed well preserved. The chrome-plated latches and fixing for the handle had the usual surface rust which can often be removed, and all the keys worked and made a noise. They were all a bit clunky, probably as a result of the felts being worn, but the sounds they made were all of varying loudness and it was clearly out of tune. I had never seen one of these before, so was very interested in taking it on as a project.
The History
The Pianet was designed by Ernst Zacharias, and the first models were produced in the 1960s by Hohner, in West Germany. They were available in several different versions, some with legs and amplifiers and the design of the electromechanical system changed over time.
This ‘T’ version was produced between 1977 and 1983, and was the black vinyl-covered variant intended for stage use, as opposed to earlier ‘N’ models intended for home use which had a Natural wood finish. Here is a good article on the complete range of Pianet instruments if anyone is interested.
Part 1
Evaluation
Marc Wolf has a sound sample on his blog if you want to hear how it’s supposed to sound. At the moment, this one sounds like someone pushing a xylophone off the edge of a cliff.
Let’s have a look at the instrument, see how it works, and get an idea of what the restoration job looks like.

There are several major tasks involved in the restoration:
- Cleaning up and refurbishing the reeds and pads
- Replacing all the keyboard felt pads – which involves disassembling it completely
- Tuning the entire instrument to standard pitch
- Adjusting the amplitude of the signal from each pickup to level the volume across the whole range
The next step will be to develop a way of cleaning and restoring one reed and pad assembly, which can then be rolled-out across the entire 61 keys.
As a first step we’re going to find a way to remove the surface rust, hopefully dealing with any pitting at the same time, and chemically recreate a new coating that will preserve the future integrity of the reed while ensuring the ‘plucking’ action of the pad still operates properly.
To do this will affect the tuning, however the entire instrument is completely out of tune anyway.
More details will be found in the video (below).
Part 1 – Video
Transcript
Here we have a Hohner “Pianet T”
The chrome furniture is a bit rusty, but it looks in reasonable condition.
It’s been stored in a barn for years, but the keyboard looks fine.
These are electromechanical, with a pickup, so it should make sound when played.
It’s clunky and out of tune, but we’d expect that.
The cover is held on with three screws which have cup-washers we don’t want to lose.
The other two came off with the screws.
Let’s lift off the top and see what it’s like.
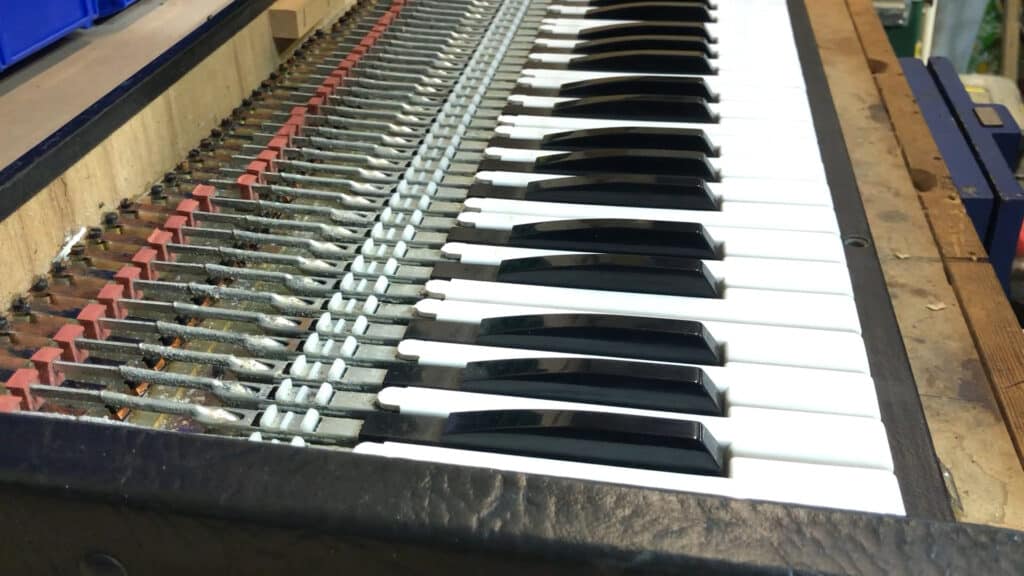
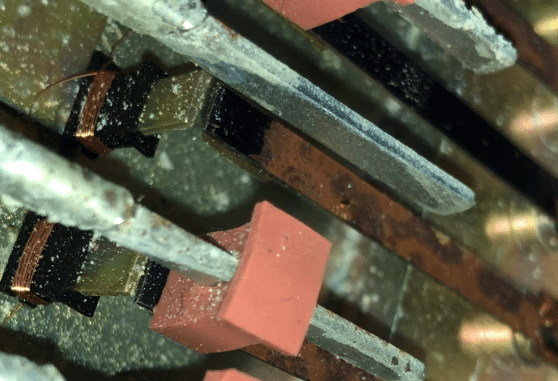
The mechanism consists of 61 keys which are arranged on rockers.
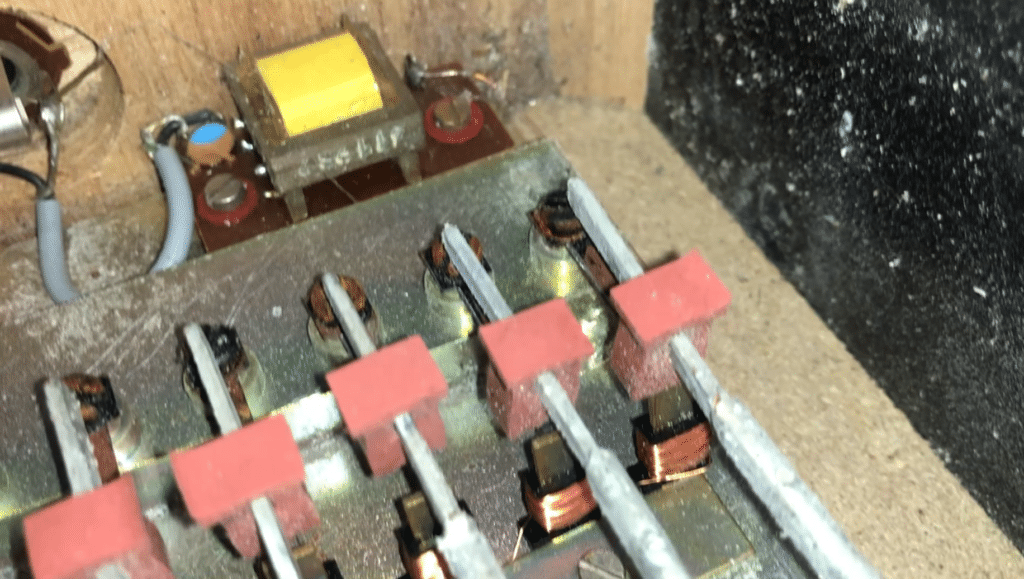
Each key has its own pickup, the coils of wire, which are all connected in series and end at an impedance-matching transformer.
Each key ‘plucks’ a reed or tine whose vibration is picked up by the coil.
The pickups look fine. Nothing is broken or missing.
The reeds – at the back – have surface corrosion, and the key mechanisms have some too, but that will clean up fairly easily.
how does it work?
The rubber pad ‘lifts’ the reed until it unsticks.
This mechanism is described in a 1961 patent.
The patent refers to the original design which used semi-absorbent leather pads. The 1973 ‘T’ is a next-generation design, however the principle is the same.
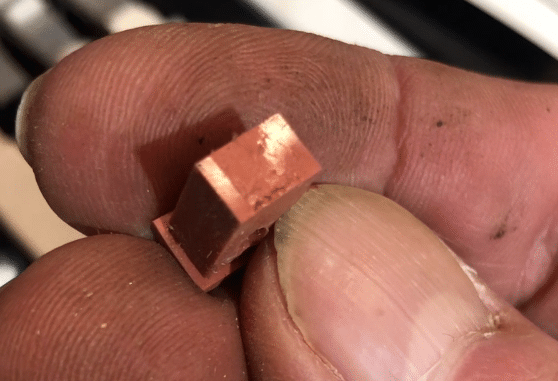
If we remove the pad, you’ll see that the surface is shiny, except where it was resting on surface of the reed.
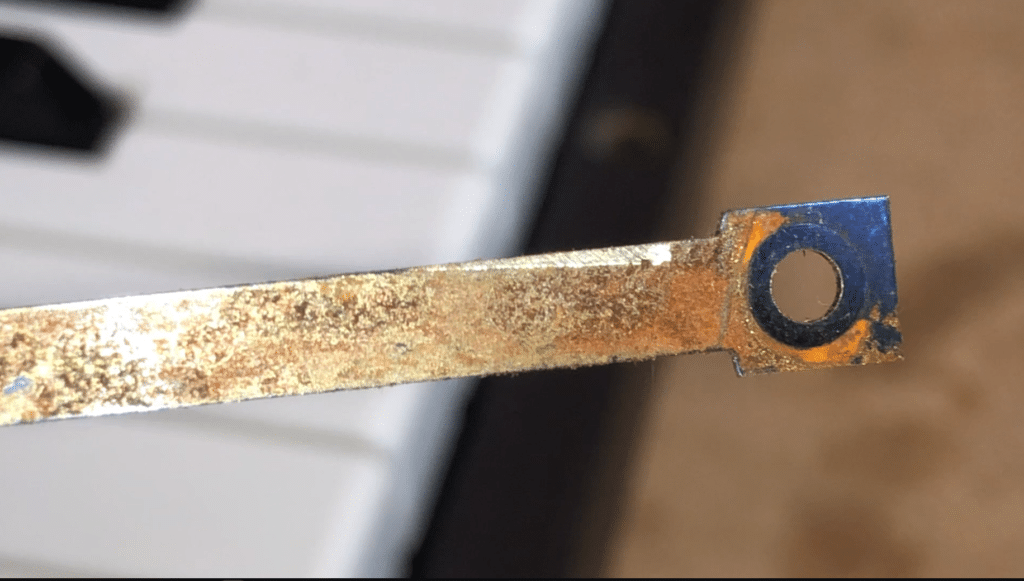
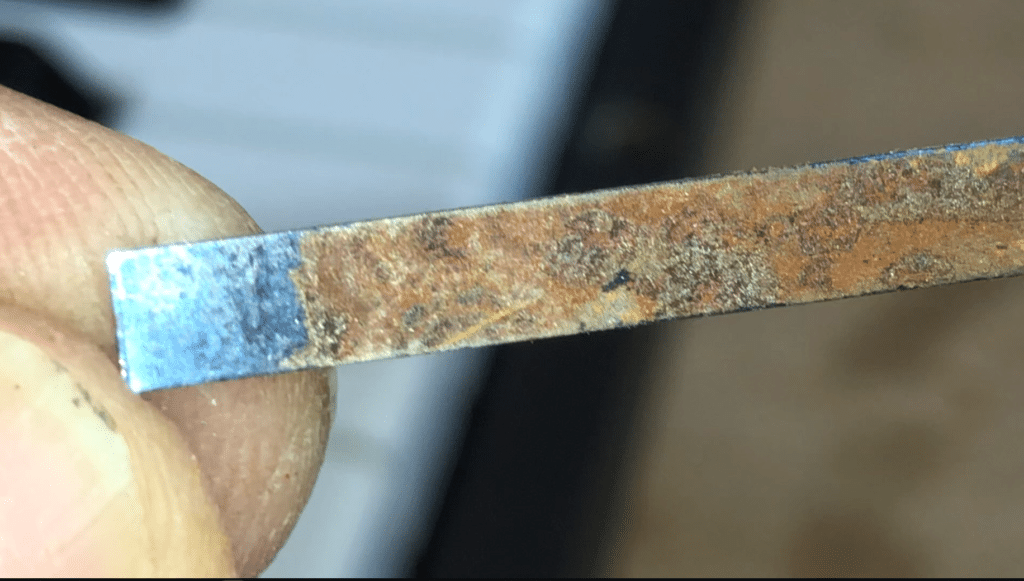
The reed is secured to a brass post by a screw.
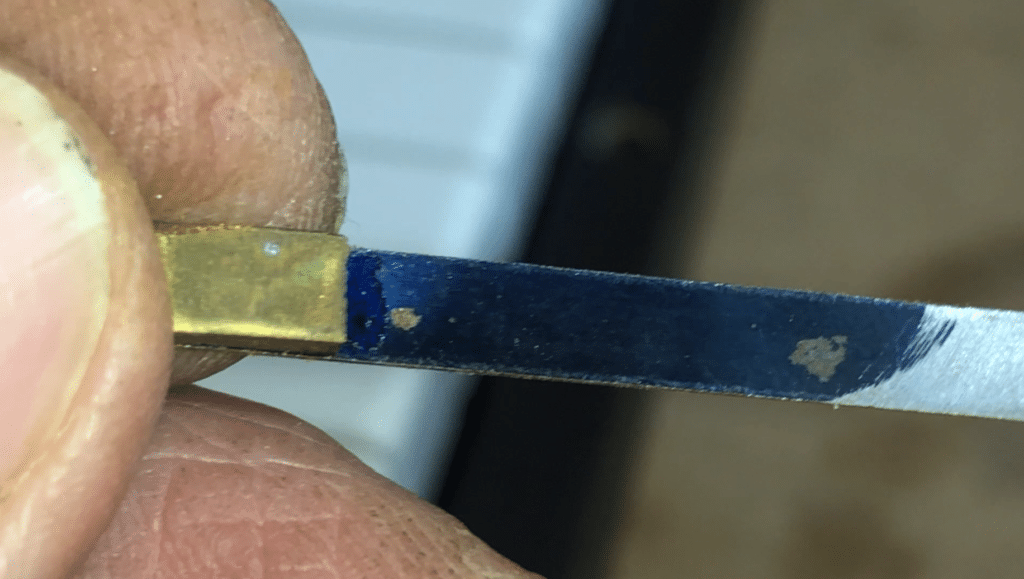
It has some type of blue lacquer coating which has succumbed to surface rust.
The reed has been coarse-tuned by filing the edge, and then fine-tuned by removing material on the flat. A brass weight has been added, and that has been filed too.
The underside of the reed is better than the top.
You can tell by the angles of the marks that these have been tuned before being installed, and this has been done with the reed ‘upside-down’ so that the filing marks are not visible when the reed is fitted to the instrument.
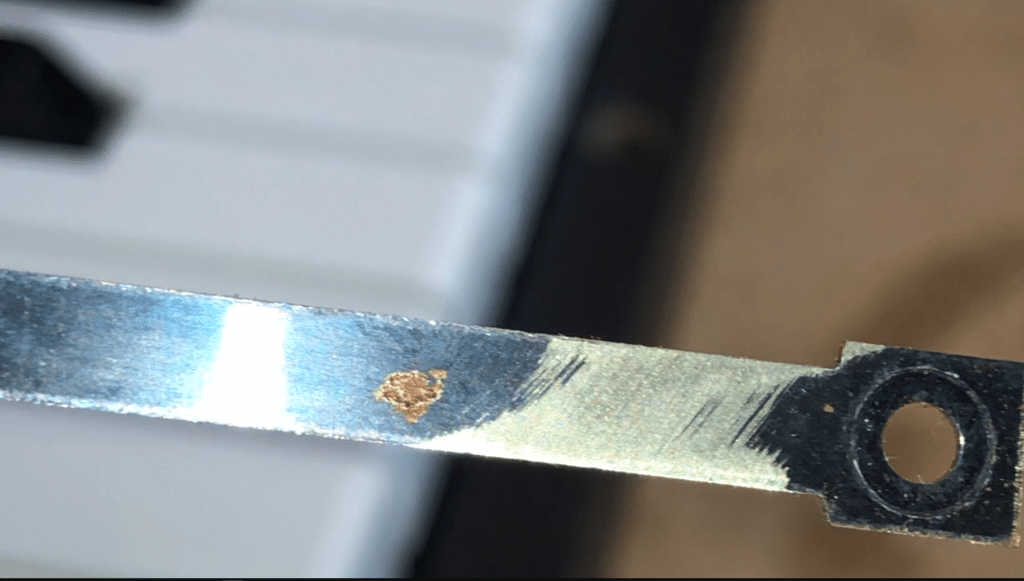
The surface cleans up well with a fingernail, but the pitting will be an issue.
It will likely affect the tonal quality of the reed.
And we must create a smooth area for the rubber pad to rest on, otherwise the polymer-attraction mechanism won’t work.
Now I’ve put it back together, that key does not work because what little polymer was on it has been wiped off.
So, Where Are We?
Well, we’re back in my office making a plan.
Contrary to popular belief, I’m not as stupid as I look, and I never would have taken that key to pieces if I wasn’t already sure I could get replacement oil.
The poly-dimethyl-siloxane with a viscosity of fifty-thousand to one-million centiStokes in the documentation was quoted for the original 1960s instrument which employed semi-absorbent pads, but the principle remain the same. We need enough viscosity to create a ‘pluck’, so I’m going to start with a thick PDMS oil and see what happens.
Viscous PDMS oil appears to be hard to get. It’s used in some automotive oils, and also as a food product, where it serves as a release agent for baking tins, however these applications are all relatively low viscosity – about 200 to 300 centiStokes – a couple of orders of magnitude away from where we want to be.
After a bit of digging around, I discovered that radio-control enthusiasts use high viscosity 100% pure silicone oil, which I believe to be PDMS, in the differentials of model racing cars.
I’ve ordered some half-million and one-million centistoke oil, which will be more like a thin paste than an oil, and we’ll see how it performs.
Various people have said that oil worked better than paste for them, mainly because the paste tended to transfer itself to the reed over time and detune it.
I suspect that we need only the tiniest amount, after all, there was no visible trace of anything on that pad or reed when I took it out, and it worked.
The surface, well that’s another issue. Some say the surface rust is unimportant so long as the landing patch for the pad is smooth. I’m not convinced. I suspect it may well affect the resonance of the reed, and I’m just not happy leaving it that way.
I suspect the patchy blue lacquer won’t help either.
I’m going to try removing the surface rust and lacquer, treat the reed with Phosphoric Acid to convert the remaining Iron Oxide in any tiny pits to Iron Phosphate, and then use a chemical bluing method to create a resistant layer, which should help prevent future corrosion.
Next time at the workshop we’ll get the instrument connected to a frequency counter and oscilloscope and see what the characteristics of the reed are like before and after.
In the meantime… I await the postman.
Stevan
Great post! Any progress on the project? I got my Pianet T a few years ago, and since there isn’t much useful information online, every bit of knowledge about servicing, restoring, and maintaining this beautiful instrument is a real treasure.
I’ve spent quite some time restoring and fine-tuning mine. It sounds really nice now, but a few keys/reeds still don’t play as well as the others. Some of them have a strange tuning issue—when you play a note, the pitch either rises or drops immediately afterward, depending on the key. This becomes especially noticeable when playing chords; they sound out of tune even though I’ve carefully tuned each key.
Also, a few reeds seem to lack presence and sustain. I’ve tried all the suggested adjustments—cleaning them, adjusting pickup positions, magnetizing them—but nothing seems to fix the problem.
Were you able to fully restore yours? Did you encounter any similar issues?
Anyway, I thought you and other Pianet T owners might find this instruction sheet helpful—it’s something I received with my purchase of sticky pads from Clavinet.com. I’ll paste it in a separate post. They turned out to be a worthwhile (though not the cheapest) investment. I didn’t go the lubricant route as you did, but the new pads made a big improvement in the overall feel, action, and sound.
Looking forward to part 2 of your endeavor!
Best,
Stevan
Steve
I’ve had little time to pursue the project over the last months, mainly because I have a camper van to restore which has taken me over ten years and I’d like it done this summer, plus I have paying work which has kinda blocked up the workshop with other parts.
I have done some work cleaning a reed and re-bluing it, which worked well, but I wanted to show a frequency analysis of one before and after treatment before I made another video. It sounded better but I’d like to have evidence of what the treatment has done – and also whether it affected the pitch.
After being sat for a while I’ll also be able to see whether the anti-rust efforts have worked.
Hopefully I’ll get back to it in the next few weeks…
Regards,
Steve
Stevan
And here is the CLAVINET.COM PIANET T/DUO “STICKY PAD” INSTALLATION GUIDE. I’ve found it very useful when I was setting up my Pianet T:
Installation Instructions:
1. Remove the screws attaching the top cover of the Pianet and pull the cover off.
2. Remove the original pink pads by sliding them off the keyshaft ends.
Clean off dirt on the reeds with rubbing alcohol. Remove light rust with fine steel wool and VACUUM.
4. Gently slide the new Sticky Pads onto the keyshaft ends. Avoid touching the flat pad surface; any dirt or contamination will reduce their performance!
5. To achieve desired attack and tone, position the Sticky Pads by sliding them back and forth on the reeds. A pad that sits further back on the reed will be softer, a pad that sits closer to the end of the reed will be louder.
6. SEE VOLUME ADJUSTMENT NOTES.
7. Reinstall the top cover.
If performance declines, inspect the pads for dirt and wash them in soap and water. Be careful not to stretch the keyshaft hole while cleaning.
Special Tip for Duo Owners:
To reduce “side to side” motion of the sticky pads, or to keep them from “walking” down the keyshafts, place a 1/2″ long piece of heat-shrink tubing on the keyshaft where the pad will be resting.
To Adjust Volume Of Individual Notes
If some notes are noticeably louder or softer than others, you may need to adjust the gap between the pickup and the reed. The pickups are the pieces of metal in front of each reed. Each pickup has a shiny copper coil wrapped at their base. If the pickup is too close, the note will produce distortion. GENTLY bend the pickups closer or away from the reeds in question with small pliers until all of the notes are uniform in volume.
The volume of each can also be adjusted by regulating the height at which the pad sits on each reed. We recommend using the Clavinet.Com Pianet Keyshaft Bender to safely bend the keyshafts up or down. Using pliers to bend keyshafts can crack keys!
Remagnitizing Reeds
If you cannot get volume from a certain note no matter what you try, you may need to re-magnetize the reed.
1. Locate a small, strong magnet (preferably a cylinder shape and no wider than 1/2″).
Brush the reed in one direction, from back to front ONCE. Next, move the magnet away from the reed, reposition it at the back of the reed. Repeat this process 20-30 times. If the volume gets worse, brush the magnet from front to back instead
3. If the magnet is too large, you may strip the magnetism from an adjacent reed. If this should occur, flip the magnet upside-down and repeat the process for the offending reed.
Tuning the Pianet T
• To flatten a note, file a small notch at the rear edge of the reed, just in front of the reed screw area. You will see notches on some reeds where they have been tuned at the factory.
• To sharpen a note, file away a small amount of the reed from the underside of the end of the reed (or its weight if equipped). The goal is to reduce the overall weight of the reed, NOT to make it shorter. You may need to lift the reed slightly to do this. Only bend it as much as necessary, do not over-bend! Be careful not to damage the pickup coil with your file! Any resulting metal particles should be removed with a vacuum.
Steve
This is really useful. The more information we can gather together the better.
I may combine all the lessons learned into a better article at some point.
I may well re-magnetise all the reeds one-by-one as I refurbish them. That’s a good thought!
I’dnot thought about using fine steel wool on the pads, I was considering 1200 paper – which might do the same thing. I’ll report back.
Franco Espindola
hey! how are you doing? I have a Hohner clavinet/pianet duo, I am going to restore the pianet. I really appreciate this exist! is the part 2 anywhere?
Thanks a lot.
Steve
Hi Franco,
I have all the things I need, but I’ve been very busy lately so I haven’t had time to do any more work on it yet.
Hopefully I’ll get more done later this month 🙂
Franco
Hey Steve! I just saw that answered thanks a lot, can’t wait to see that haha.
Good luck
Best
Steve
At the moment, the process of removing the rust, treating with Phosphoric Acid, and re-blueing the reeds does appear to be working 🙂
Franco
Hey Steve how are you doing? Here Franco again, how Is it going the pianet? I couldn’t continue it, I hope soon I can. I have a couple of questions to do. What Is the brand or kind of blue lacquer are you using? Do you reblue this just painting this with a brush? Or how? And the other thing I wanna ask Is, once you remove the rust, re-tune the reeds, wha happens with the tuning when you reblue them? Thanks! O hope hoy are good. Best
Steve
Hi Franco,
I will do my next video this week. Hopefully that will provide more information. I was also unable to complete the full restoration on the one I had because hte owner wanted it back, but I did get the reeds to work 🙂
dirk
I Steve, I just started a restoration on a 1974 Pianet-T I received form a friend (was sitting unused in his basement(humid) for 40 years). It looks relatively clean inside, similar to yours. I agree the reeds should be cleaned to perfect finish. I use a metal bruch on a high speed polis dril machine – gently push downword onto the reed surface, cleaning off both oxidation and coating (for now only the top surface). I did this so far only on 15 of the highest key reeds , for trials. Not sure at this point how this will affect tone and pitch, I’ll see later. I didn’t install new pads yet, as original ones looked quite intact, just cleaned the sticky surface part with my finger nail, as not to damage its surface. They look all clean now, but not sure if they will stick properly (not tried that yet). Most likely they will not, so as you suggested , I may have to re-oil them, or eventually replace them. I’see later for that. The next issue I noticed is that the volume is virtually zero, on ALL keys . So maybe the transformer is defective, but I don’t know how to test that. The copper wire of the coils is intact (no electrical resistance) over it. Measuring the voltages of the individual pickups is not possible, and likely also too weak (small) as well to measure with a simple voltage multimeter. So now I’m VERY curious for your next video on how to handle that part of the restauration. Keep the good vibes going !!
Steve
Hi Dirk,
I do have more to add regarding the reeds and I must finish the video. The owner of the instrument really wanted it back, so I won;t be finished the entire job, but I did make progress with the reeds.
You might find the reeds have lost their magnetism, and another ommenter here provided some really good notes on re-magnetising them.
The pickups are all in series – it’s one long strand of wire wrapped around each post in turn – so it should have continuity from end-to-end. Maybe it’s damaged at some point along it’s length, or is shorted to the frame – one of the metal posts?
The pads will need re-oiling, and I found oil that worked. That will be in the video too.
dirk
the great comments!. I’ll take those into consideration along the way and post the results according. thanks man !
Franco
Amazing Steve! Thanks