After spending many years refurbishing my 1989 VW T25 Camper which is fitted with a Waterboxer DG Series engine, I finally had to give up on the carburettor.
The original Pierburg 2E3 was suffering from issues, but a service kit and readjustment didn’t fix my problems, which were that it didn’t start from cold, ran lumpy, and until it warmed up it would stall when opening the throttle. After following lots of advice, none of which helped, I decided that I’d either have to get it professionally refurbished, or buy a new one. Unfortunately, they don’t make them any more, and refurbished ones are like gold dust. Some companies used to refurbish them, but seemed to not be taking any new orders. It is possible to replace it with a Weber, but apparently that is taller and requires a bulge putting into the engine compartment lid, which is not an option in the camper because that would be in the middle of the bed.
Pierburgs are often claimed to be unreliable and difficult to setup, but those who know the carburettor well say that they are fine and its just a matter of knowing what you’re doing. Mine has certainly done well for over thirty years, so I can’t complain. If I had infinite time and patience I could probably have found the problem, but the refurbishment project had already taken me many years and I needed the vehicle back on the road.
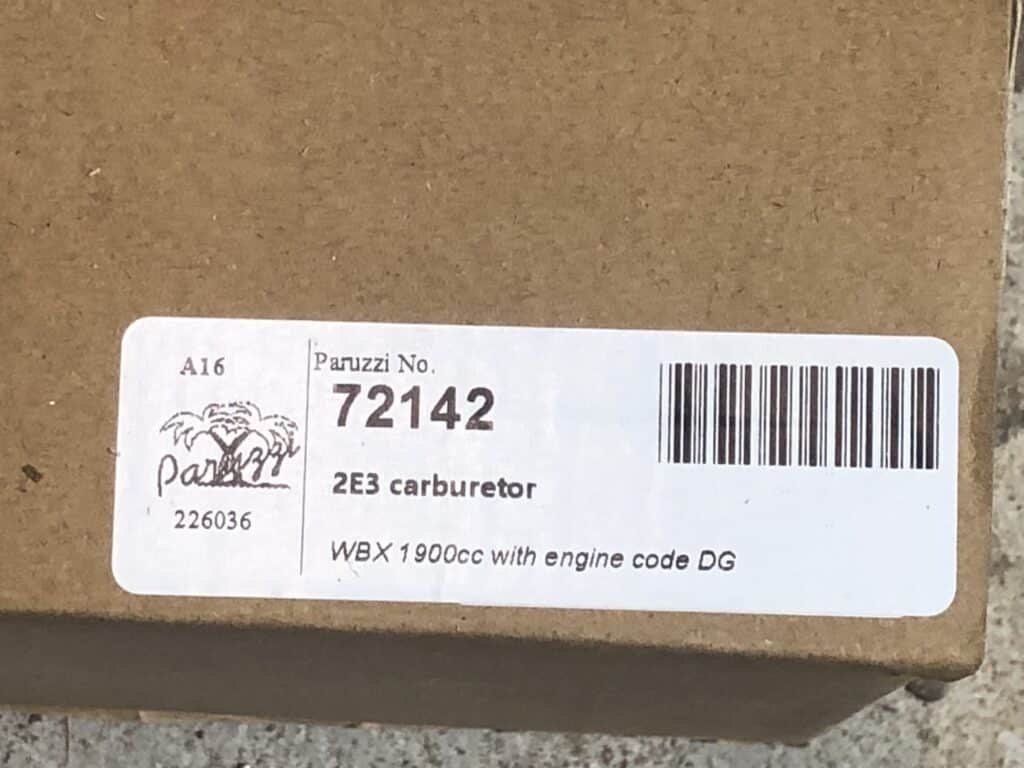
I was not willing to buy a ‘refurbished’ carburettor from eBay. I’d already serviced mine and it hadn’t helped, and it was too much of a risk to take, so I went on the hunt for compatible replacements and finally decided to buy one from Paruzzi in the Netherlands. It cost me about £260 plus £75 import duty.
This is my experience of fitting it.
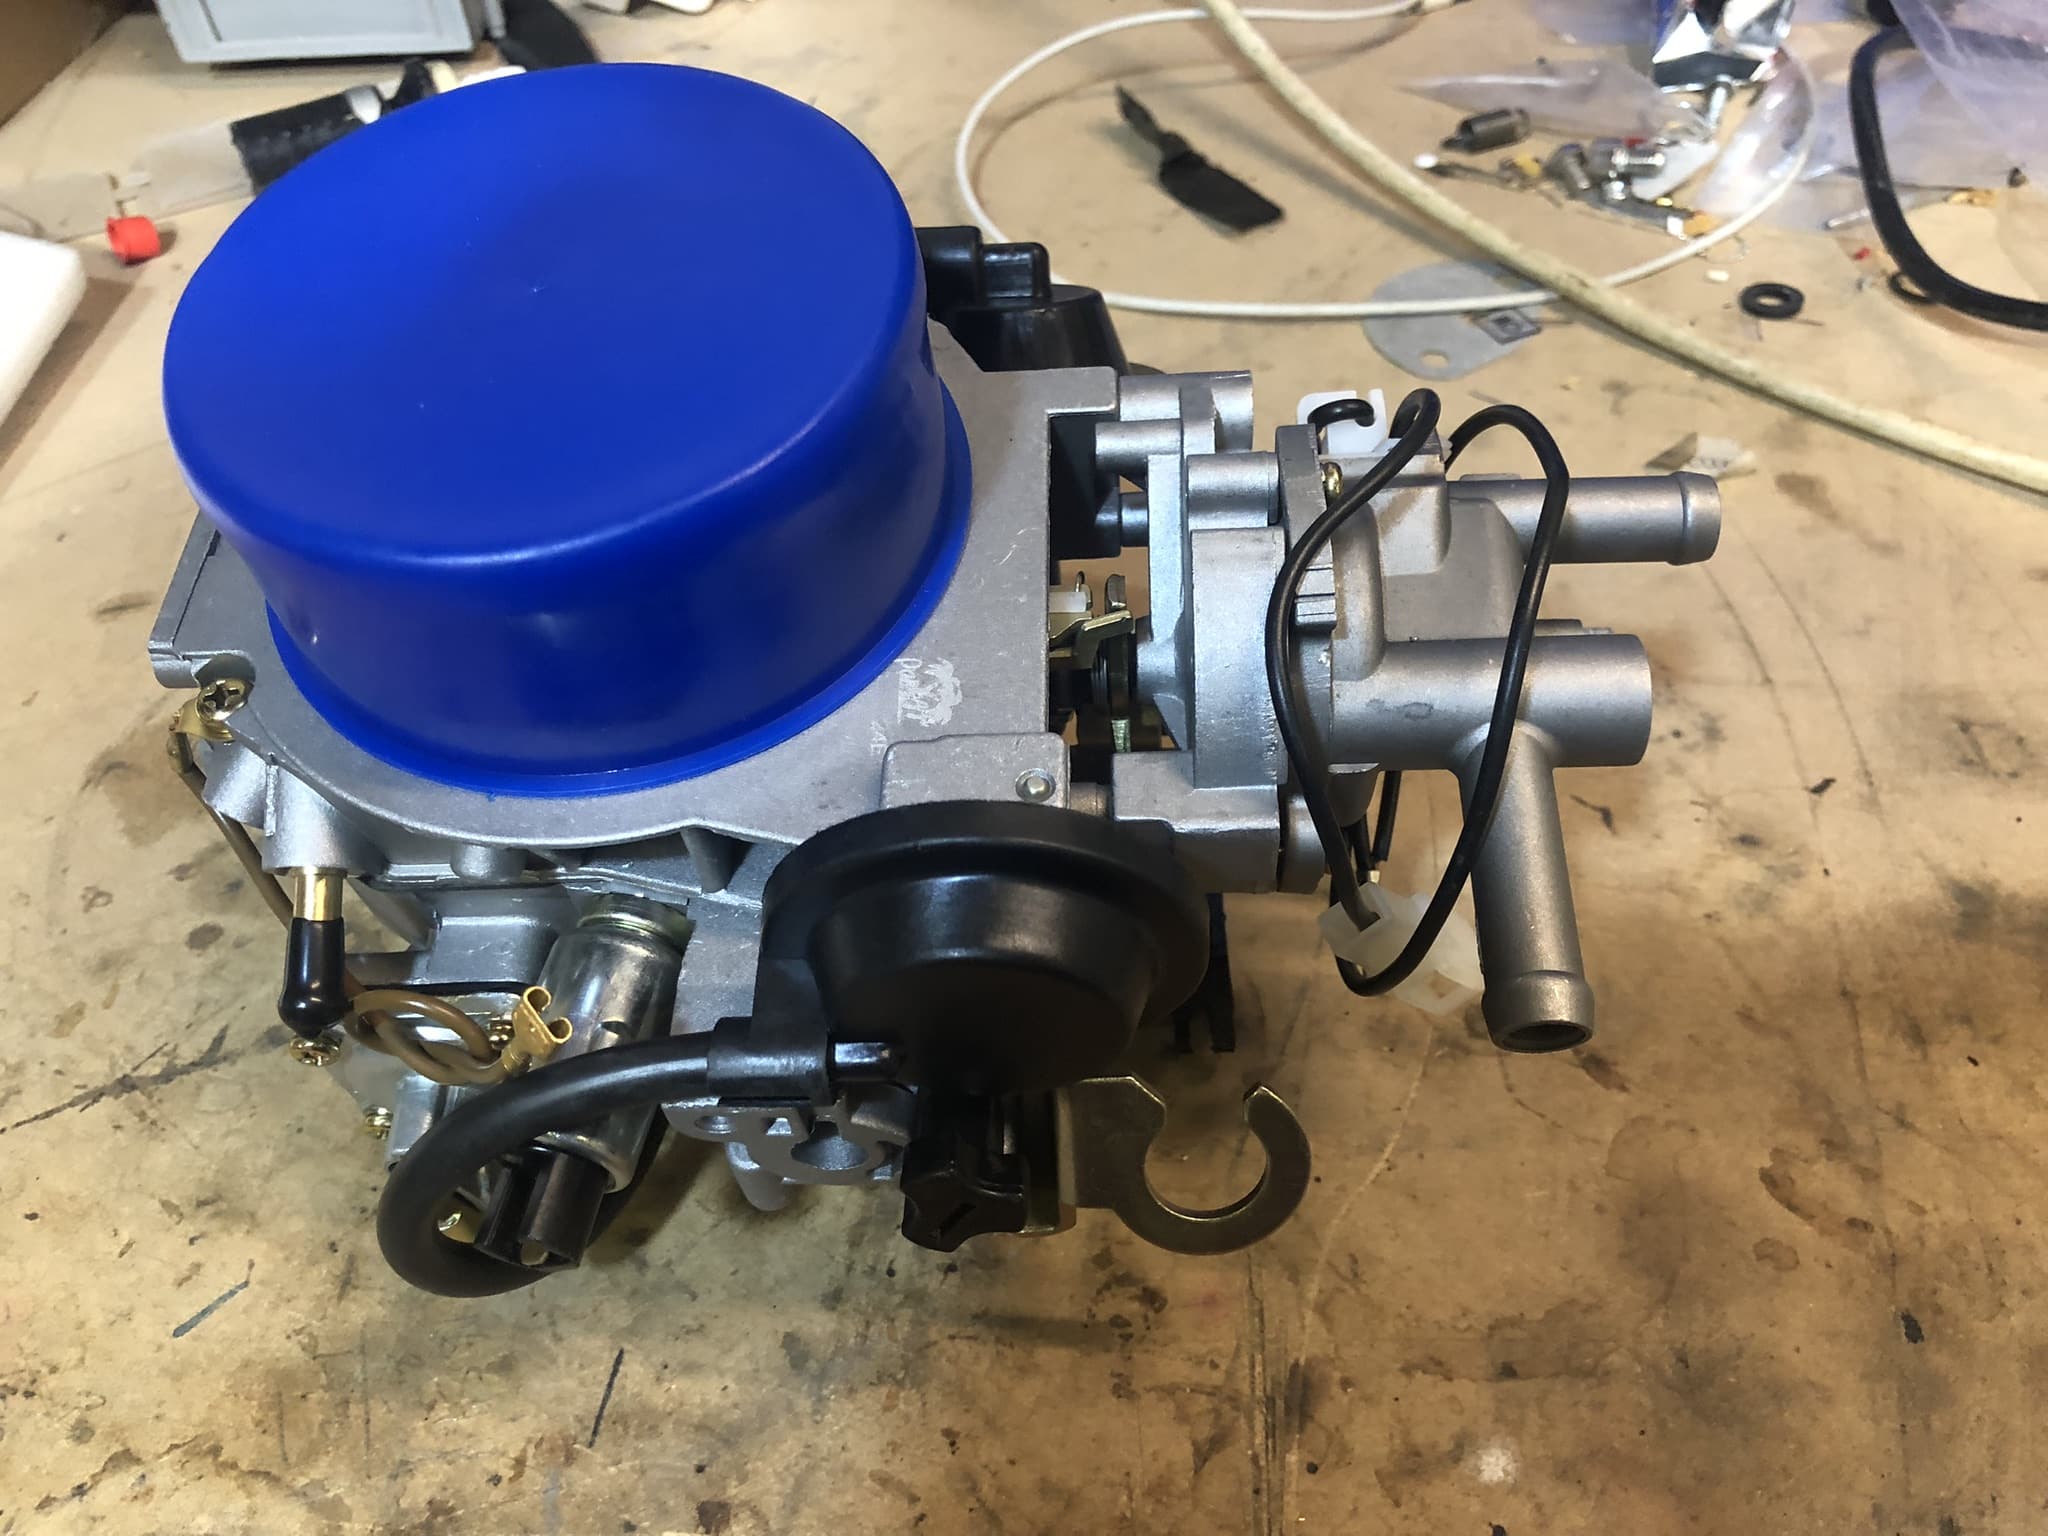
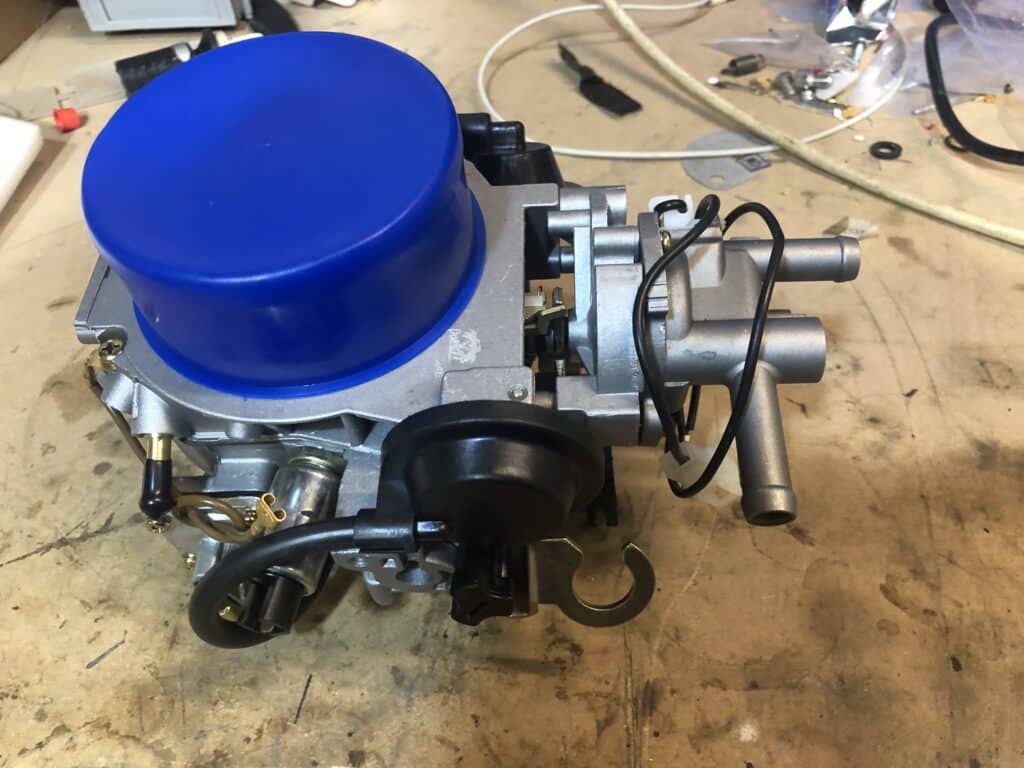
The unit was advertised as a 2E3 replacement for a DG series engine, and the description noted that I would probably have to replace the throttle linkage with the one off the old carburettor. Buying one that was intended for the DG engine of course is ideal because the Pierburg 2E3 is used on all sorts of engines and is undoubtedly jetted differently for each. The complicating issue is that the DG engine is also used on many different vehicles, which have different assortments of plumbing.
I got it working, and it works beautifully, but it wasn’t a five minute straight swap, as you will see.
Unpacking
This was shipped in a waterproof bag, in a box containing a foam liner which was then wrapped in padding and enclosed in an outer box, and sent by UPS. I received the customs duty notice from them and paid it in advance of delivery. Paruzzi were prompt with shipping, however UPS managed to add a delay of two days between it arriving in the UK and at my door. This means I received two notices of “Your parcel will be delivered between x and y tomorrow” and it wasn’t. I therefore arranged to be at home to receive it on three consecutive days, only to find it was delayed.
Throttle Linkage
The linkage supplied on the Paruzzi is intended to be operated by a cable which comes from what I would call ‘the front’ of the unit. This means the cable goes over the top of the cam and pulls it to rotate it anticlockwise. On the T25, the throttle cable comes from behind and goes under a cam to rotate it anticlockwise. It is also spaced off to the side of the carburettor on the end of a rod with a coupling in it. This is why it’s necessary to swap over the linkages – they vary widely from vehicle to vehicle.
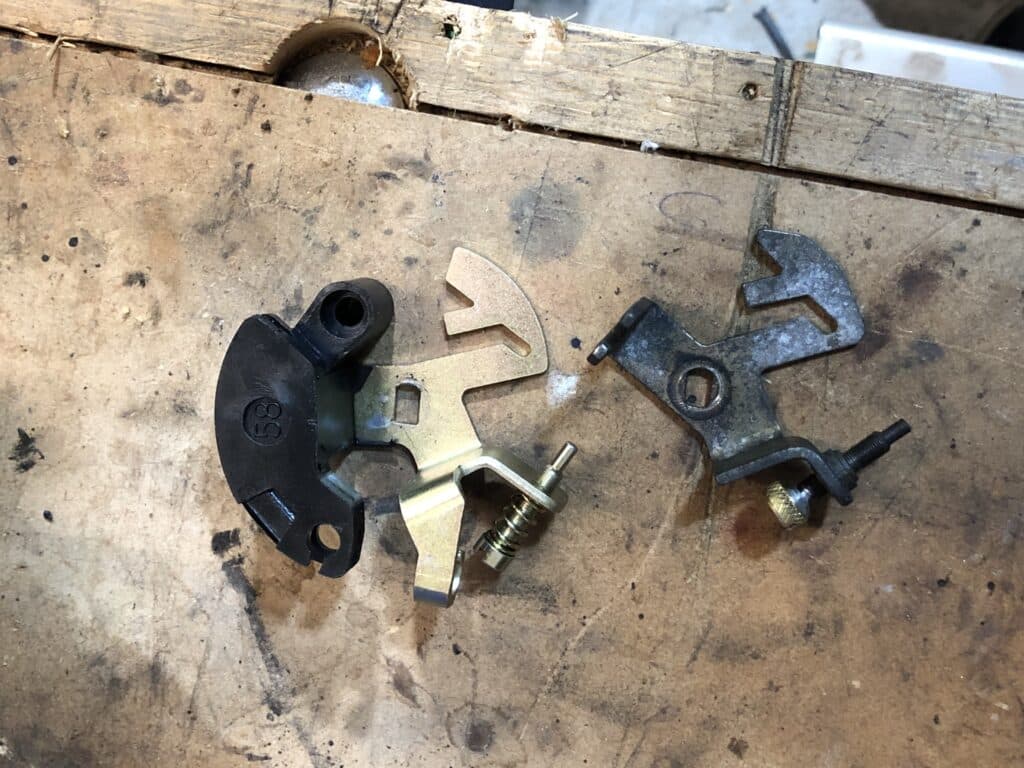
The immediate concern was exactly what to swap. The plate that connects to the throttle linkage and works the butterfly also contains the adjuster which sets the fast idle speed, and the cam which opens the choke, so swapping that with the existing one was only going to work if both those mechanisms lined up against the relevant parts of the new carburettor. If not it was going to require some engineering.
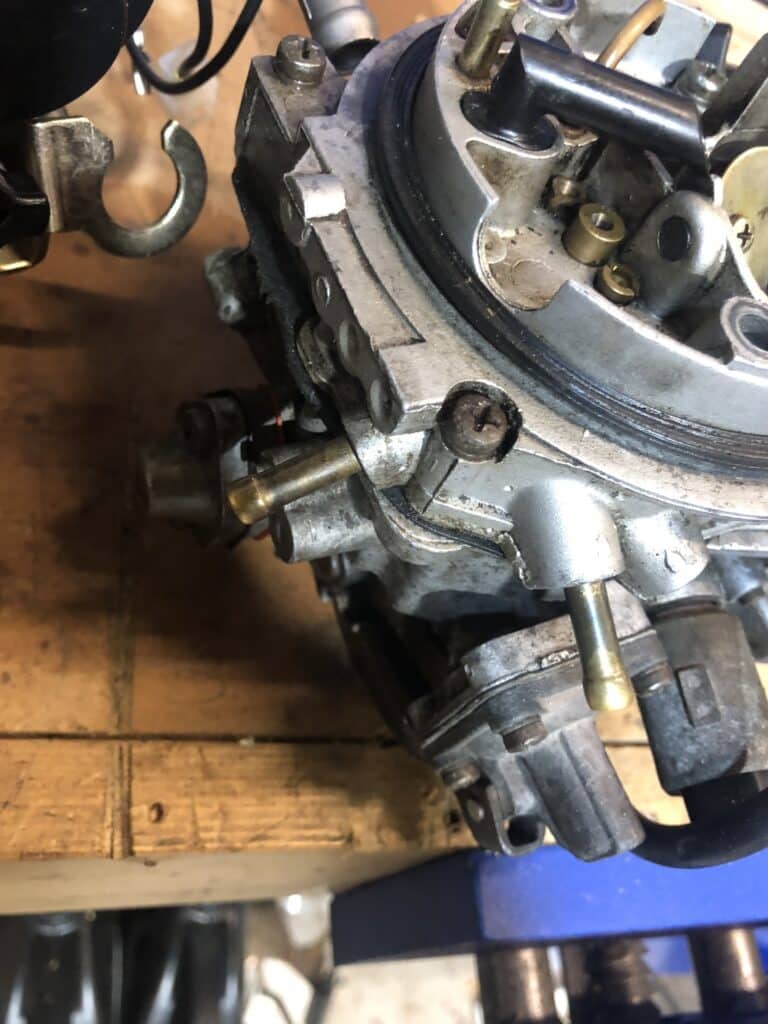
The plate on the new carburettor was easily removed by folding back the tab on the 12mm nut, removing it, and lifting the plate off. It’s on a threaded shaft with flats to provide alignment and also prevent it from rotating.
Removing the existing plate from the old carburettor was not quite so simple. The nut on this is actually part of the linkage rod, which was simple enough although it’s a 10mm a/f, but it seemed like the plate on that unit was somehow welded to the other. In fact it wasn’t. It just required a bit of gentle prising and tapping having been well tightened up for three decades.
Putting them both on the bench showed that the cam which worked the choke flap was identical, however the angle of the adjuster for the fast idle speed was noticeably different. Fortunately, the hole and flats, and the thread of the shaft were the same (Fig. 1)
If these had been different it would have meant a lot more work. Modifications to any part of the new carburettor would have rendered it non-returnable in the event that it didn’t prove suitable, and any modifications to parts from the existing one would have made it impossible to put back together again – thus leaving me with nothing, and being unable to move the vehicle even by allowing it to warm up.
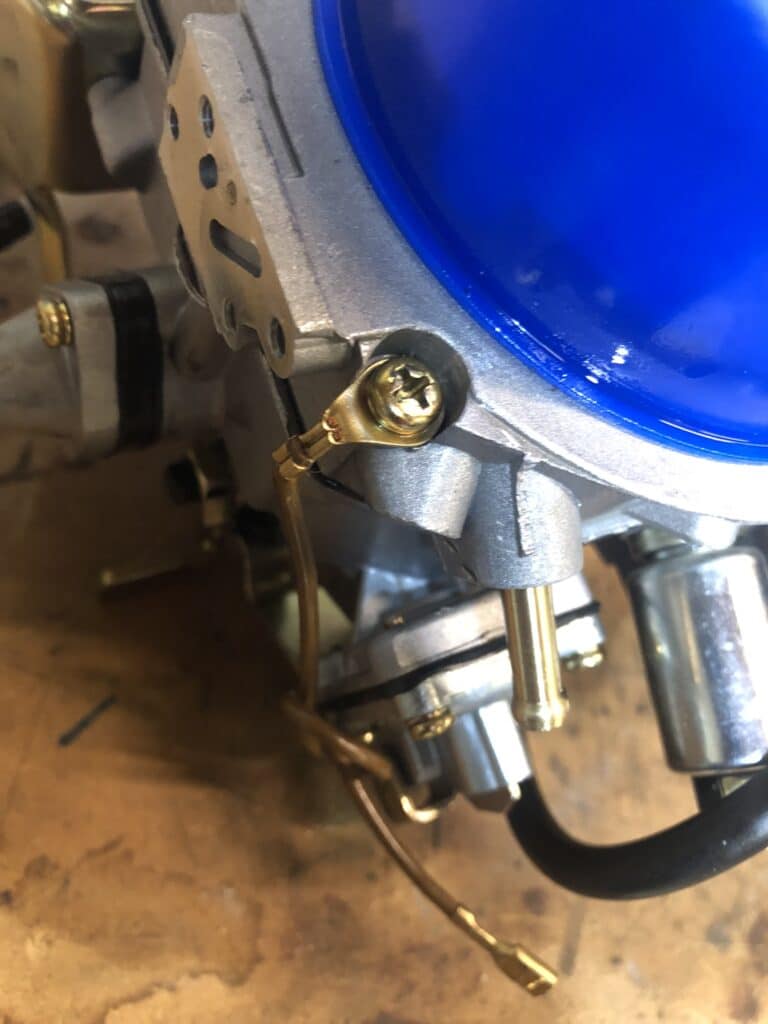
Fitting the old linkage plate to the new carburettor confirmed that the cam and the adjuster did align, so it was possible to refit the entire linkage (Fig. 2). I kept the washer with the locking tab on it, even though the original assembly didn’t have one.
That was good. I now had a carburettor that fitted, at least mechanically.
What is immediately noticeable about it is how easily the choke flap closes when the thermostat is cold, unlike the old one which seems sluggish by comparison. It also closes fully, which mine did not. I suspect that I had adjusted the gap when I serviced it without the throttle being in the fully open position, which would explain why cold starting had been an issue. Without experience of that type of carburettor, or having a known working unit to compare it with, I had never noticed that. I was therefore optimistic of seeing the cold-start issue resolved.
Fuel Feed
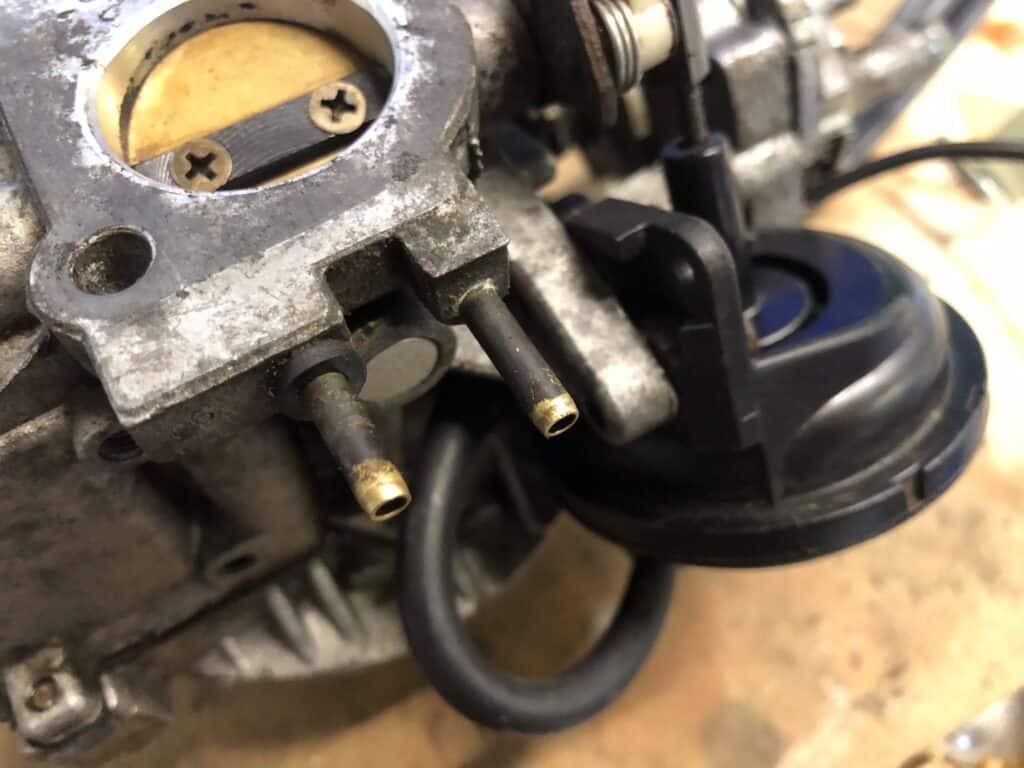
My vehicle has a recirculating fuel system, where the fuel pump supplies petrol to the carburettor, which takes what it needs via the float chamber valve, and the unused fuel exits the carburettor via an outlet pipe, and is returned to the fuel tank (Fig 3).
This replacement carburettor only has an inlet and is not designed to recirculate fuel (Fig 4). This is why some fuel systems specifications state a minimum and maximum pressure for a fuel pump. Too high and fuel is forced through the float valve when the chamber is full and that results in a mixture that is over-rich, or it floods the engine. Some engines using the 2E3 don’t have a fuel recirculation system, and this version of the carburettor is clearly designed not to need one, so the only issue is whether my fuel pump generates excess pressure. I tested it and it doesn’t. It produces between 4 and 5 psi, which seems fine. My return pipe to the fuel tank is therefore redundant and can have a stop-end put on it. I’ll leave it in place in case I ever need to go back to a different carburettor.
Vacuum
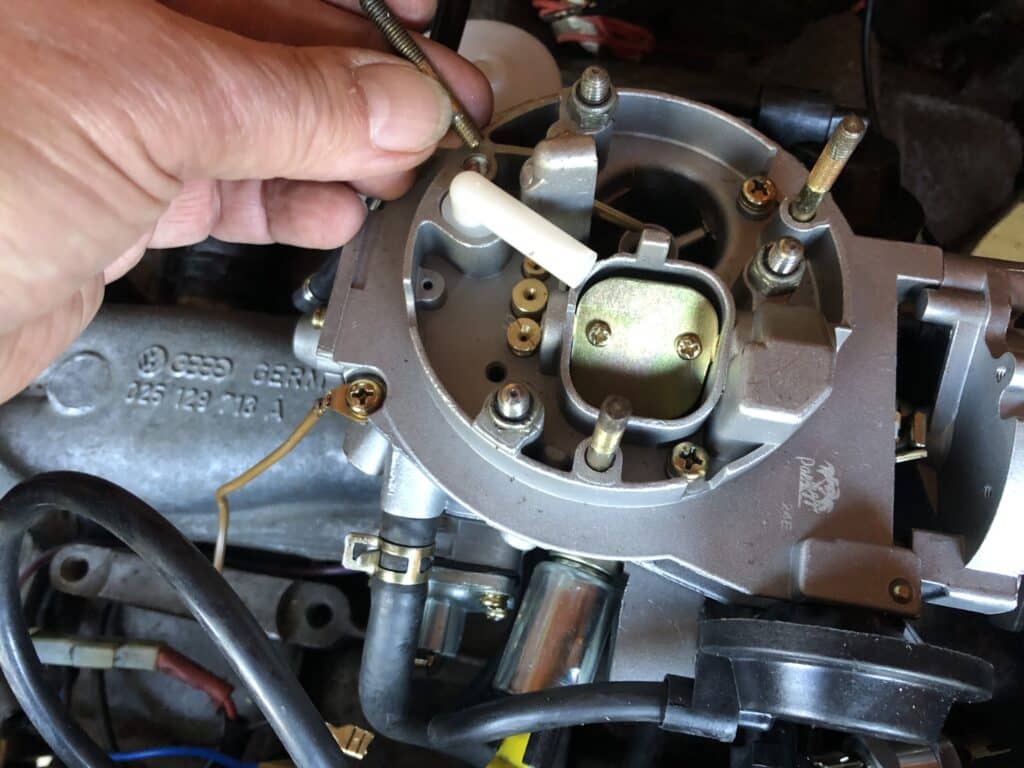
On the back of the old carburettor are two vacuum pipes, one of which is typically blocked off (Fig. 5). The replacement carburettor doesn’t have them. You will find the tap for the vacuum advance on the front of the new carburettor, and it is a slightly larger diameter. Fortunately, my vacuum pipe to the distributor is silicone – I replaced it many years ago – and it still fits. I suspect a hard rubber one might have resulted in me having to take to the lathe to make an adapter as my workshop is an hour’s round trip to anywhere I could buy one. Apart from that I like working on the lathe.
Odds and Ends
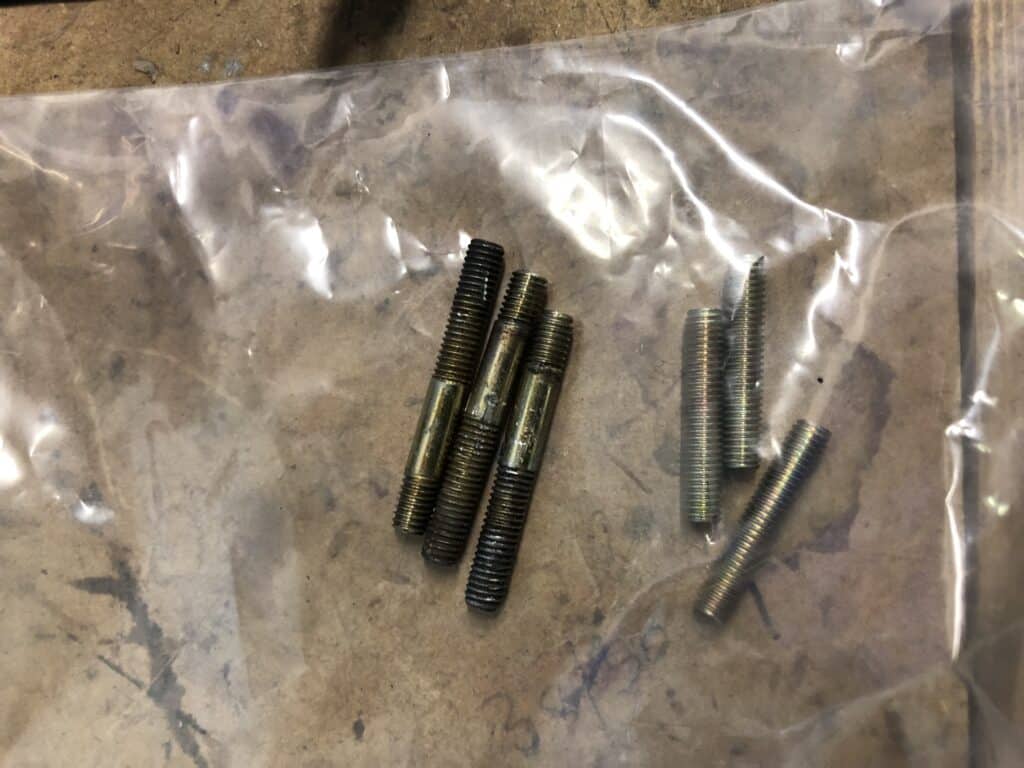
You will need to remove the studs from the old carburettor and fit them to the new one (Fig. 6). Three are supplied (Fig. 7) but they are not long enough for the air intake on the T25.
The other thing you might need to do is change the connector on the choke heater wire. The new carburettor comes fitted with a long wire with an uninsulated crimped 6.3mm female halfway along it, and a shrouded 6.3mm male at the end. This seems to be designed to allow the heater and the idle-valve to be operated from one wire, as the connector in the centre reaches the valve. It is however unshrouded and the free end is the wrong polarity to connect to my harness.
I already have two separate wires for the idle valve and the heater so, once I had successfully fitted everything and got it running, I cut the heater wire to an appropriate length, and fitted it with a suitable shrouded connector to match my harness.
You may want to remove the vapour separator which is attached to the new unit. It isn’t in the way but I took it off because it wasn’t needed.
It Works – Another Discovery
The engine started surprisingly quickly considering the float chamber was empty. It runs really well and is responsive to the throttle even from cold.
The vacuum pipe to the distributor was now much too long having previously connecting to the back of the carburettor and now connecting to the front. When I pulled it off to trim it I expected the engine to struggle, as I’d done it while it was running. It didn’t really make any difference, and I then realised that there really wasn’t much vacuum compared to how much I had with the old carburettor in place.
A quick measurement with a vacuum gauge showed that there was about -2 to -3 inHg. After digging out the specs for ignition advance that seemed reasonable at idle. I am not retrofitting everything to find out but I’m sure there was much more vacuum pressure from the old carburettor judging from how much I remember the pipe “sucking” on my finger.
A bit of research reveals that it’s likely the old carburettor had a problem, possibly caused by the gasket but not always, where manifold vacuum was appearing on that pipe, instead of “ported” vacuum (upstream of the throttle plate) which is what is used to operate the ignition advance. This is probably another reason why starting was poor and the engine ran badly. According to the graph, manifold vacuum would have resulted in full ignition advance all the time, even at idle.
Vacuum on those connectors is apparently obtained through a drillway from the upper side of the chamber, above the throttle plate, which somehow relies on a very exact seal of the gasket across the entire surface of the manifold and carburettor, and can often be fixed by flattening the mating surfaces using fine grit paper and a block, and replacing the gasket. But again, it might not. I suspect the replacement unit may not be designed that way being as how the connector is in a completely different place, so the new design may well be an improvement in that respect.
Conclusion
The Paruzzi replacement for the Pierburg 2E3 carburettor is a great success and was not difficult to fit.
The manufacturer warns that it might be necessary to replace the throttle linkage, but there are other differences to deal with when fitted to the DG engine in a T25. Of course, they would not know this because DG engines are fitted to lots of vehicles and they do not claim it is a straight swap.
It wasn’t problematic, but it wasn’t a five minute job. It took me an hour, which still isn’t bad because at least half of that time was spent scratching my head. If I had to do it again it would probably take me half-an-hour.
Having seen how a brand new setup works I was able to identify two major issues with the carburettor I had. I may have eventually discovered how the choke flap is supposed to work when closed, and fixed mine, but I still may not have discovered the vacuum issue. I don’t have much hair left as it is and I’m not in the market for pulling any more of it out trying to fix problems with a 35-year old carburettor that is no longer available.
If your 2E3 is giving you nightmares and you’re not a carburettor expert, I would highly recommend swapping it for the Paruzzi one.
You can find this on the Paruzzi web site: https://www.paruzzi.com/uk/volkswagen///?zoektrefwoord=2E3+carburetor
Jon
I recently purchased the same carb from Ali Expresses, the Sherryberg. China has been using an old-generation Passat/Audi80 derivative named the Satana for years, and I guess these are from them, as VW sold the tooling to China.
Thanks for posting the fitment; however, I will use the Vapor/swirl chamber because of the fuel pump location and the chance of vapour lock. I think this was the reason the T25 had the bypass, which helped to keep the temperature of the fuel pump down (as it’s mounted directly on the block). I have had a couple of issues with the vapour lock when the pump was on its way out in very hot conditions. When you stop with a very hot engine and no coolant flow, the excess heat from the fuel pump vapourises/boils the fuel inside it, and it won’t start until the fuel liquifies again and it can draw from the tank. Your case may be worse as the pump is directed to the carb, however, you are in Scotland, and it rarely gets hot.
For a while, I had an electric pump and a safety lockout circuit; this helped cold starting when standing for a long time; even though I had a pressure regulator, a VW specialist said it could still harm the float needle, etc.. I may refit it with the swirl chamber, as I don’t like the fact the original fuel pump gets bloody hot.
Just thought I would let you know the issues with vapor lock and the fuel pump
Steve
Hi Jon,
Good to hear about the vapour lock experience. I’ve also had fuel pump issues on and off for years, even with the recirculation system. Very occasionally the engine would lose power, stall and refuse to restart, but this sometimes happened in cold weather and after only a few miles of driving. We do take it to Europe so sometimes it gets hot 🙂
Does the swirl chamber connect between the fuel pump output and the carb? If so I expect the pump fills it from the top and the feed to the carb comes off the bottom, otherwise it wouldn’t work unless it was full, but I don’t understand how that helps with the vapour lock. Diagrams seem hard to find. I have no issue using it if it serves a purpose, but I wasn’t aware of the vapour lock problem.
Regards,
Steve
Jon
The swirl pot connections I found online make sense: The top is from the fuel pump, the bottom is back to the tank, and then the middle is to the carb. I am going to put it on the van this week and give it a run; I managed to source the throttle parts and the ball nut off a T25 group; this will enable me to keep the old 2e3 and rebuild it. Did you have to adjust the mixture or the fast idle settings?
Jon
I also sourced some 92mm O rings from Amazon that fit the top of the air box to carb housing. My current flat rubber seal is falling apart. Great write up!
Steve
I had trouble with the air filter box clips because they were all corroded, but I sourced some austenitic spring wire and made some new ones because I couldn’t find any replacements.
I made a jig and a tool to bend them because it was the only way to form the little spring sections in them. I’ll write that up soon but I need some better photographs.
If necessary I can make new clips for people if they want them, but I don’t know what the demand is like. I just couldn’t source any and there’s no point in having a workshop if you just buy everything 🙂 Now that I’ve made the jig I might as well use it.
Steve
The fast and slow idle did need adjusting. I suspect the mixture will need adjusting too, but I’ll let my guy at the garage do that when he does the MOT for it.
My swirl pot only has two connections 🙁
Paul Dennis
After nearly a year of running with the Paruzzi carburettor are you still pleased with the performance? I have exactly the same problems with my 1.9 DG engine in the T25 of poor choke performance and inability to idle when cold. I’m thinking of replacing it with the Paruzzi and then when I have time carry out a full service and reconditioned of the Pierburg 2e3.
Steve
Hi Paul,
I am very pleased with it, yes. I’ve not run the camper for long journeys because I’m still fixing the roof, but the new carburettor seems great.
I believe the issues with my old Pierburg may simply have been caused by the setting of the gap on the idle flap. When I serviced it, I set that gap to the specified opening, but I noticed with the new carburettor that the idle flap closes completely when the engine is cold.
On further investigation I realised the opening of the idle flap is supposed to be set with the throttle fully open, so I’d made a mistake and set it up incorrectly. I suspect that, if I adjusted that throttle flap properly the old carburettor would probably work fine.
Without seeing that I would have spent forever trying to fix in – and tearing out what little hair I have left – so buying a new one was worth it anyway because it got the vehicle running and I had a ‘good’ one to compare my old one with.
Paul Dennis
Hi Steve,
That is reassuring. I think I’ll invest in the Paruzzi carb. I spent a short while investigating the Pierburg this morning and noticed that the choke flap wasn’t closing at all! I suspect that there is a broken or faulty linkage somewhere. I closed the choke flap manually. It had about a 3mm gap and started the T25. It fired up instantly and settled into a steady idle. Clearly a choke problem but buying the Paruzzi will give me time to fully clean and service the Pierburg. Not bad to have a back up!
Steve
I bought one that was specified for the DG series engine. I’m not sure whether they come with different jets for different serial numbers.
I’ve also not meddled with the idle mixture screw. I don’t know if that was already set, but I’ll see what my man at the garage says about the emissions when I go for the next MoT.
I’m guessing it’s not the sort of thing that can be set reliably at the factory.
Paul Dennis
Good morning Steve,
I’ve now received the Paruzzi carb. It’s exactly the same model as yours and for my 1991 T25 with the 1.9 DG engine. Your guide to fitting will be invaluable. I had already noted the lack of vacuum advance connection that is on the rear of the old carb, and the front connection which as you say takes vacuum from above the first stage throttle flap. I’ll try fitting it today and see how I get on. My first thought is to use the vapour separator. I know that 1.9 DG engined T25 synchros used a vapour separator.